
I’ve done a bit of work on my place since moving in, and if you’ve read my earlier posts you know some of it worked out great and some was a bit more difficult. With a kitchen remodel and new hardwood floors the place is really looking great.
The most recent upgrade was to finally finish the hardwood flooring project this summer. My boyfriend installed the floors, but we decided to hire a contractor to do the trim, door threshold and transition pieces into the bathroom and kitchen. My building manager recommended Silva Construction and they were extremely professional, did a phenomenal job on the project in one day and were very reasonably priced.
This weekend I tackled a smaller DIY project on my own. My ceiling fan broke some time ago, and I’ve had a new one from Home Depot sitting on the floor of my apartment taunting me for weeks now. Apparently running a fan for four years straight without ever turning it off can burn out a motor. Lesson learned: occasionally turn fan off, especially when not at home or on vacation!
After returning from a great Thanksgiving weekend, I decided why not give it a shot. I watched a couple videos on Home Depot on how to do it, read the instructions that came with my new fan and set out all the pieces and tools I would need. My place is pretty old so it runs on fuses instead of circuit breakers and all of the electricity in my apartment is powered by a single fuse, so I was working by flashlight in the bedroom and hoping to finish before I lost all of the daylight coming in from the main room. Of course I forgot about how much earlier it’s getting dark these days and ended up finishing the project in a very dark room.
I undid the wiring and removed the current fan and light fixture in place. I was moving a bit slow since I was very paranoid about messing up a fan that hangs over my bed while I sleep, but I finally got to the wiring stage. There was no ground wire in my apartment so things just weren’t matching up with the instructions I had on how to hook up the wires. I decided it best not to guess and sent a picture of the wiring situation with a please help text message to my brother. He called and talked me through what color to hook up where and I was back in action.
After completing the wiring, I covered it up with the canopy, attached the fan blades and then affixed the light fixture. Now was time for the moment of truth. I’ll be honest, I didn’t have a whole lot of confidence that this would actually work out. I plugged the fuse back in and flipped the switch and to my amazement I had a working fan and light! It really was an easy project, so I’m probably more proud of this than I should be, but it’s the toughest DIY project I’ve done on my own and succeeded at, so I’m going to go ahead and brag about it!
-
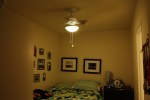
- new ceiling fan
-

- new trim and transition piece into kitchen
